It is not possible to put into words how happy our babies make us. So I'll just quickly share a picture with the people still visiting this blog:
Saturday, 2 May 2015
Meet Olivia and Etienne
The last year has been a very exciting one. In September our beautiful twins Etienne and Olivia were born. They were two months early but healthy. Since then they've been growing, getting their first teeth (currently Etienne has one and Olivia two) and starting to crawl.
It is not possible to put into words how happy our babies make us. So I'll just quickly share a picture with the people still visiting this blog:
Sunday, 18 August 2013
Tidying up a bit
In case anybody is wondering: I deleted a big part of my old blog posts today. Mostly posts where I was advertising scrapbooking kits by Meagan's Creations or Shel Belle Scraps. Quite a few of the layouts in the posts were deleted from galleries and therefore not visible anymore and a lot of the information in the posts was outdated (including freebie links).
I didn't want anyone to visit my blog in search of a freebie just to find out that it's no longer available.
I'm still a big fan of Meagan though. Her shop is now at Scrap Matters and I think she's just getting better and better.
I didn't want anyone to visit my blog in search of a freebie just to find out that it's no longer available.
I'm still a big fan of Meagan though. Her shop is now at Scrap Matters and I think she's just getting better and better.
Saturday, 17 August 2013
Template freebies
Inspiration is all you need. I was inspired by a layout by "Stampin Rachel" at The Lilypad. You can have a look at it here: "Yes please, more of this". I really liked the clean and simple, graphic style design. Reminds me of the pages Cathy Zielske is doing (I took a scrapbooking class with her quite a while ago). Rachel allowed me to turn her beautiful layout into a template. And because I liked it so much, I made two more similar templates.
There's a spot for a journaling card on each layout. So if you are more into graphic style and want to use your stash of cards, you might like my templates.
Here's the preview. Click on the picture to download the three templates (only PSD files, made in CS2). As always, they are for free, but it would be nice if you leave a comment.
There's a spot for a journaling card on each layout. So if you are more into graphic style and want to use your stash of cards, you might like my templates.
Here's the preview. Click on the picture to download the three templates (only PSD files, made in CS2). As always, they are for free, but it would be nice if you leave a comment.
And here are two layouts I did with the templates:
Credits for supplies: Destination adventure blogtrain freebies by
Amy Wolff, Little Butterfly Wings, ald
Credits for supplies: That's life blogtrain freebies by
Amy Wolff, 2am Designs, Pink Reptile Designs, Erica Zane and Penny Springman
Friday, 1 February 2013
BLOG TRAIN Hello February
After a long while without designing, I really enjoyed playing around with the pretty colors given for the Stuff to Scrap "Hello February" blogtrain. And here is what I came up with:
Desert Digi Scrap
A-M Digital Designs
Karen Diamond Designs
Shuckclod's Stuff
Cajun Diva Scraps
Lots of Pretty Things YOU ARE HERE
Baby Yaks
MDK Scraps
Wendy Tunison Designs
Scrappin Serenity
WinksArt Graphics
Growing Pains Scrapped
Scraps by Andrea
KapiScrap & Art
Scrappy Chicka
DinkeekDooScraps
Saphira's Scraps
The Scrappy Kat
Studio Linda Renee
Scraps N Pieces
Queen Bee Scraps
Sairi Designs
Digital Scrapbooking Resource Center
Joyful Expressions
Have fun downloading all the other goodies!! Here are the links:
Please note: Due to different timezones it might take a little while until all links are working.
A-M Digital Designs
Karen Diamond Designs
Shuckclod's Stuff
Cajun Diva Scraps
Lots of Pretty Things YOU ARE HERE
Baby Yaks
MDK Scraps
Wendy Tunison Designs
Scrappin Serenity
WinksArt Graphics
Growing Pains Scrapped
Scraps by Andrea
KapiScrap & Art
Scrappy Chicka
DinkeekDooScraps
Saphira's Scraps
The Scrappy Kat
Studio Linda Renee
Scraps N Pieces
Queen Bee Scraps
Sairi Designs
Digital Scrapbooking Resource Center
Joyful Expressions
Friday, 30 September 2011
Rustic Autum Kit and Freebies
Hello scrappers! Meagan's Creations has a new release today, Rustic Autumn. This fall kit is elegant and timeless with a brillant palette for scrapping our memories under the falling leaves. Enjoy the reds, oranges, golds and plums of fall with this versatile kit.
And her amazing creative team also created 7 quick pages (12x12) which you can also purchase!
Both packs are on sale for 30% off this first week!
And check out some of the amazing layouts by her Creative Team (of which I am a part!):
Dana
Here's mine: I also used a template from the "Cluster Me Template Set" by Meagan's Creations
Kandice: This layout also uses the "Girls Word Art" by Meagan's Creations
Kendra used a template by Memories by Digital Design.
The amazing creative team of Meagan's Creations has also made some gorgeous freebies for you!
HERE'S MINE (click on preview to download):
Don't forget to leave some love!
And her amazing creative team also created 7 quick pages (12x12) which you can also purchase!
Both packs are on sale for 30% off this first week!
And check out some of the amazing layouts by her Creative Team (of which I am a part!):
Dana
Here's mine: I also used a template from the "Cluster Me Template Set" by Meagan's Creations
Kandice: This layout also uses the "Girls Word Art" by Meagan's Creations
Kendra used a template by Memories by Digital Design.
The amazing creative team of Meagan's Creations has also made some gorgeous freebies for you!
HERE'S MINE (click on preview to download):
Wednesday, 17 August 2011
August Color Challenge Freebies
I love the color challenge at Stuff to Scrap. One monthly color swatch and all those generous and talented girls that share mini-kits and quickpages ... I wanted to contribute something as well, so I used the beautiful mini by Adriana's Café called "Raining in my flowers" to make two quickpages.
If you like them, click on the preview to download them. If you want to grab the other freebies as well, go to the August Color Challenge thread at STS (registration required).
Monday, 8 August 2011
Ride it cowgirl kit and a freebie
I think I did mention before that I joined SAHM Scrapper's (aka Becky) creative team. Together with Christi she's "Designing Divas" and they've just released a super-cute kit today, that's called "Ride it Cowgirl"(goes for boys just as well!).
Here's the preview (linked to store). If you like it, it's a good idea to get it now because this week it will only be $ 2.50.
If you want to have a closer look before you buy the kit, enjoy downloading the cluster freebie I made for you (just a bit further down)!! HAVE FUN!
Here's the preview (linked to store). If you like it, it's a good idea to get it now because this week it will only be $ 2.50.
If you want to have a closer look before you buy the kit, enjoy downloading the cluster freebie I made for you (just a bit further down)!! HAVE FUN!
Saturday, 16 July 2011
Perfect holiday kit: Are we there yet?
Meagan's Creations and Digital Harmony just released a new kit that is perfect for all your holiday, travelling, road trip pictures (and lots of other ones!!). It's called "Are we there yet?" (bet you've heard that one before...) The kit is bright, fun and has loads of cute elements and papers. It's available at Stuff to Scrap. The add on kit, word art pack and brag book are already out as well. Or, if you want it ALL, just go and get the BUNDLE!
And here's my LO with the kit:
Friday, 8 July 2011
Take notes - a little freebie
Of course just scanning a few pages of notebook paper would have worked as well, but I did make these digitally and enjoyed it. Hope you have some use for them (pencil is included)!!
Click on the picture to download and leave a note if you like it!
Saturday, 2 July 2011
Another WordArt Freebie
Here is one more WordArt Freebie for you. Font used is: Spicy Sushi Roll (Can be found HERE).
Click on preview to download and leave a comment if you like the freebie!
And here is a second version of the same WordArt:
Click on preview to download and leave a comment if you like the freebie!
And here is a second version of the same WordArt:
Friday, 1 July 2011
BLOGTRAIN - At the park
I haven't done that much designing the last few months but I couldn't resist the bright and fun colors of the "At the park" blogtrain (hosted at Stuff to Scrap).
So here's the preview of my part (click on the picture to download):
Stuff To Scrap Blog
Lotsofprettythings YOU ARE HERE
Scraps by Andrea
Simply Kelly Designs
Flower Pot Designs
Brianna's Scrapper
scraphannah
Jensen Motley Crew Designs
DoubleTrouble Scraps
Let Me Scrapbook!
The Scrappy Kat
Sweet Creations
Saphira's Scrapdesign
Scraps N Pieces
Lovely Creations
Shel Belle Scraps
Scrappin Serenity
The Digi Scrapping Mama
Note-able Scraps
Every EverAfter Moment
Eva Marina Scraps
Scrappin Ninnie
So here's the preview of my part (click on the picture to download):
And here are the links for the other blogs, enjoy downloading lots and lots of goodies!!
Please note: Due to different timezones it might take a little while until all links are working.
Lotsofprettythings YOU ARE HERE
Scraps by Andrea
Simply Kelly Designs
Flower Pot Designs
Brianna's Scrapper
scraphannah
Jensen Motley Crew Designs
DoubleTrouble Scraps
Let Me Scrapbook!
The Scrappy Kat
Sweet Creations
Saphira's Scrapdesign
Scraps N Pieces
Lovely Creations
Shel Belle Scraps
Scrappin Serenity
The Digi Scrapping Mama
Note-able Scraps
Every EverAfter Moment
Eva Marina Scraps
Scrappin Ninnie
Monday, 27 June 2011
Quickpage freebie
With Meagan's great freebie kit "Up, up and away" (available for free until July 1st at STS) I made a cute quickpage - for the hero in your life.
Click on the preview to download the QP (and don't forget to grab the kit before it goes into the store).
Sunday, 26 June 2011
Up, up and away kit by Meagan's Creations now in shop
If you missed this super cute kit as a freebie for Stuff to Scrap's Color Challenge, it's available now at the shop at 40 % off. Click on the preview to go to STS:
Friday, 24 June 2011
WordArt Freebies
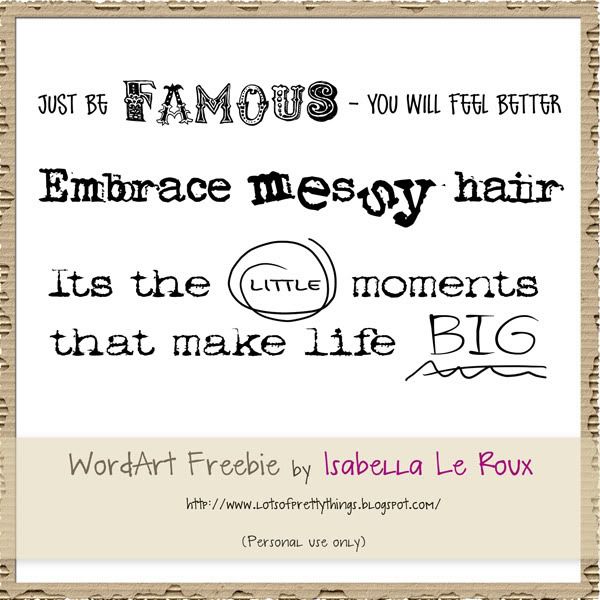
I wanted to try something different again and since I came across some really fun quotes on the net, I tried to make some wordart.
Here's my first try, you should be able to download it directly by right clicking on the image:
If you like it, please leave a comment, if you use it on a scrapbooking page, credits would be appreciated (Isabella Le Roux).
Monday, 6 June 2011
The lion sleeps tonight CT blogtrain!
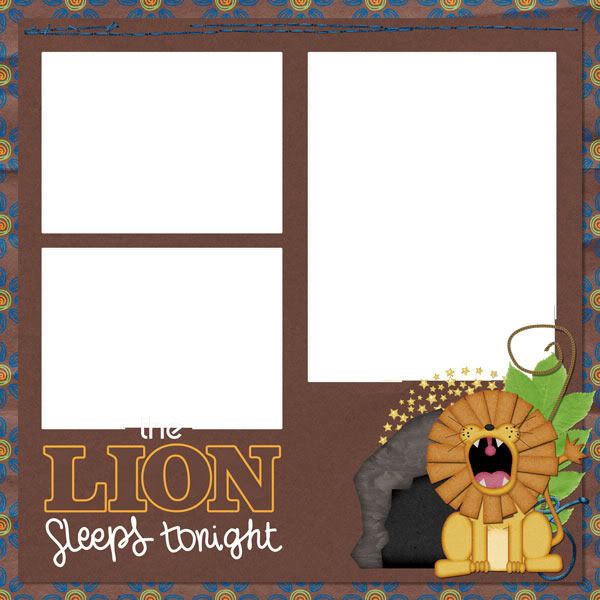
Freebies for you!! The CT members of Meagan's Creations and ViolaMoni Designs made some cool freebies for you (quickpages, clusters, wordart) using the brandnew "The lion sleeps tonight" kit.
Here's my quickpage for you (click on the picture to download):
And here are the links for all the other blogs:
(Please keep in mind that due to different time zones it might take a while until all posts have been published.)
Dana
Marlyn
Lahni
Kandice
Isabella (YOU ARE HERE)
Viola Moni
Jamie
Kaymee
Momma Ducks
MacFanGirl
Here's my quickpage for you (click on the picture to download):
And here are the links for all the other blogs:
(Please keep in mind that due to different time zones it might take a while until all posts have been published.)
Dana
Marlyn
Lahni
Kandice
Isabella (YOU ARE HERE)
Viola Moni
Jamie
Kaymee
Momma Ducks
MacFanGirl
Monday, 31 January 2011
All the pretty badges
I saw vintage badges on a few different scrapbooking sites and they were just so cute that I decided to make some myself and share them with all of you. I love what I ended up with: 25 badges that will be a great addition for your layouts, just the "little something" that you sometimes need to finish a beautiful page.
I got slightly carried away when I started surfing blogs and websites offering freebie vintage images. I'm still so excited about all the beautiful pictures I downloaded. I hope I will have some time to make some more element packs using them!!
Click on the image to download the badges. And if you like it please leave a comment and tell your friends. THANKS!
I got slightly carried away when I started surfing blogs and websites offering freebie vintage images. I'm still so excited about all the beautiful pictures I downloaded. I hope I will have some time to make some more element packs using them!!
Click on the image to download the badges. And if you like it please leave a comment and tell your friends. THANKS!
Saturday, 29 January 2011
Useful knowledge for blogging
I love learning new things and when I started this blog a long while ago (I would have to check the first post) I was immensely proud and happy about managing to set up a blog at all. You might say "it isn't that difficult anyway" but I didn't KNOW that before I tried to do it.
The wonderful thing about the internet is that there are lots and lots of helpful people out there who will give you advice. So in the next few weeks I want to contribute something as well and share some of the things that I've learned about blogging (or the links to some pages that explain everything much better than I ever could).
I want to start with
CUSTOMIZING YOUR BLOGGER PAGE
Please note: This is not a tutorial for setting up a blog. You can find a very detailled tutorial for this on: How to set up a blog for beginners.
There are lots and lots of great templates for blogs out there. http://www.blogskins.com/ is a cool page for downloading templates. If you just want some inspiration go to: 100 nice and beautiful blog designs.
If you get really inspired you can take the whole thing one step further and simply do your own blog design.
All those scrapbooking supplies you have on your harddisc are perfect for customizing your blog. If you look at the "Beyond Words" template (found on blogskins) you might notice that it uses supplies from a the Express yourself freebie kit by Ronna Penner.
Changing the background
Go to Layout. In the Layout Tab, go to Edit HTML. You are going to edit the html code now, but don't worry, it's far easier than it sounds.
Scroll down on the template until you see an area called body.
Right now one line of the body part says: Background-$bgcolor; (or someting along that line).
Change this to:
Background-image: url(your Picasa webalbum/photobucket jpeg link here!) ;background-position: center; background-attachment: fixed; background-repeat: no repeat;
This is where you are going to enter in your background jpeg from wherever you uploaded to. Simply paste your image link (should end in .jpeg) inbetween the parenthesis.
Where do you get the image from?
In you Picasa Webalbum/Photobucket open the background picture you uploaded in full size/100 %, then right click on it and copy the address/URL shown in the window that pops up, make sure to copy the whole address.
Inserting the header
Next scroll down until you find the portion of the HTML that says header-wrapper. There is a line of code that says border. Delete the entire line of code. The line of code starts with the word border and ends with a semi-colon.
Scroll down a little further and you will come to header. Again delete the entire line that says border.
These two steps delete the 2 small gray lines that are at the top of your blog that surround your header area.
The last part of the HTML that youn need to edit is the width of the outer-wrapper and header-wrapper. You need to change both of these widths to 700px. Once you have changed those two lines. Your blog template is done. Save the changes and view your blog.
How to you get your header to show?
Go to Layout> Page Elements and edit the Header.
Upload your header from your computer. And choose: Instead of Title And Description.
THAT'S IT!
The wonderful thing about the internet is that there are lots and lots of helpful people out there who will give you advice. So in the next few weeks I want to contribute something as well and share some of the things that I've learned about blogging (or the links to some pages that explain everything much better than I ever could).
I want to start with
CUSTOMIZING YOUR BLOGGER PAGE
Please note: This is not a tutorial for setting up a blog. You can find a very detailled tutorial for this on: How to set up a blog for beginners.
There are lots and lots of great templates for blogs out there. http://www.blogskins.com/ is a cool page for downloading templates. If you just want some inspiration go to: 100 nice and beautiful blog designs.
If you get really inspired you can take the whole thing one step further and simply do your own blog design.
All those scrapbooking supplies you have on your harddisc are perfect for customizing your blog. If you look at the "Beyond Words" template (found on blogskins) you might notice that it uses supplies from a the Express yourself freebie kit by Ronna Penner.
The tutorial that helps me customizing my blog was by Nicole Young from DSP. I can't find it on her blog anymore but here are the instructions (parts of it is the original text by Nicole):
MAKING A BACKGROUND AND A HEADER
For making a background create a 1450 pixel by 1100 pixel background image and save it for the web at 72 ppi (ideally in Photoshop).
Please note: Depending on the resolution that your screen is set on and the size of your screen more or less of this BG will be visible. Keep in mind that although YOUR screen might only show a bit of the background, other people might see much more than you.
Make sure the middle part of your background is in a light color and not heavily patterned. This is were the text will be and you want to make sure, it will pop off the page.
Make a separate header for the page: A good size is 700 pixels by 142 pixels (save for web at 72 ppi) again.
MAKE IT LOOK PRETTY
If you're using scrapbooking backgrounds or elements to make a background and header, keep in mind that the industry standard for scrapbooking elements and bgs is 300 dpi. So if you want to use them for your blog the easiest thing to do is: Save the element you want to use under a different name (save as) and then change the resolution (in Photoshop under Image - Image size) to 72 pixels/inch, which will also make the file size much smaller.
I made a Christmas background for this blog the other day using Meagan's kit "Retro Holidays". This is what the background looked like (without header).
Basically it's like making any scrapbooking page. You use a background, add some elements - and make sure you leave space in the middle for yor blog text and on top for the header.
UPLOAD BG AND HEADER
When you're done decorating background and header, upload the images to a photosharing platform on the web (eg. photobucket or Picasa webalbum). When you upload the files make sure you upload them in full size.
With Picasa chose the "original size" option, in Photobucket make sure you go to "Customize your upload options" - in small print below the update button - and chose "Best possible quality while staying 1 mb or less".
THEN SIGN ON TO YOUR BLOGGER ACCOUNT
I assume you did set up an account and chose some standard template.
Changing the background
Go to Layout. In the Layout Tab, go to Edit HTML. You are going to edit the html code now, but don't worry, it's far easier than it sounds.
Scroll down on the template until you see an area called body.
Right now one line of the body part says: Background-$bgcolor; (or someting along that line).
Change this to:
Background-image: url(your Picasa webalbum/photobucket jpeg link here!) ;background-position: center; background-attachment: fixed; background-repeat: no repeat;
This is where you are going to enter in your background jpeg from wherever you uploaded to. Simply paste your image link (should end in .jpeg) inbetween the parenthesis.
Where do you get the image from?
In you Picasa Webalbum/Photobucket open the background picture you uploaded in full size/100 %, then right click on it and copy the address/URL shown in the window that pops up, make sure to copy the whole address.
Inserting the header
Next scroll down until you find the portion of the HTML that says header-wrapper. There is a line of code that says border. Delete the entire line of code. The line of code starts with the word border and ends with a semi-colon.
Scroll down a little further and you will come to header. Again delete the entire line that says border.
These two steps delete the 2 small gray lines that are at the top of your blog that surround your header area.
The last part of the HTML that youn need to edit is the width of the outer-wrapper and header-wrapper. You need to change both of these widths to 700px. Once you have changed those two lines. Your blog template is done. Save the changes and view your blog.
How to you get your header to show?
Go to Layout> Page Elements and edit the Header.
Upload your header from your computer. And choose: Instead of Title And Description.
THAT'S IT!
For more instructions and lots of more link to resources have a look at: Tips & tricks for blog templates & blog design.
3 x 3 Valentine's card freebies
The creative team members of Meagan's Creations and Designs by Snowlady have teamed up and made some gorgeous Valentine's Day Cards for you!
Blogtrain no longer available.
Download my contribution at: Valentine's Card
Blogtrain no longer available.
Download my contribution at: Valentine's Card
Labels:
Blog train,
Freebie,
Meagan's Creations,
Valentine's
Friday, 28 January 2011
Quick page freebie for Love Story Collab Kit
Valentine's day is approaching fast and this is a perfect time for making some layouts about the present, past and future of your relationships. The "Love story collab" kit by Megan's Creations together with Designs by Snowlady gives you loads of elements and papers to work with. It's available at both shops: at Stuff to Scrap and at Scrapable.
And for all the busy girls out there: I've used the kit to make a pretty quickpage freebie for you (PNG file).
Hope you like it!
Here's the link for downloading it: Remember Quickpage.
And for all the busy girls out there: I've used the kit to make a pretty quickpage freebie for you (PNG file).
Hope you like it!
Here's the link for downloading it: Remember Quickpage.
Subscribe to:
Posts (Atom)